
In this post, I’ll describe the steps I took to install untreated, Douglas Fir board and batten vertical cladding on my tiny house.
It seems that there are number of terms that could be used instead of cladding, such as weatherboarding or siding. For the sake of simplicity I’ll stick to cladding.
Step 1: Choose the cladding style and material
I wanted the tiny house cladding to resemble that of a typical tobacco drying barn that can still be seen dotted around the Dordogne valley.
(Although the industry is in decline, there were still nearly 500 tonnes of tobacco grown here in 2019)
If I could achieve something similar to this, then the tiny house would be fairly discrete and look ‘at home’ among the local agricultural architecture.
Evidently, the cladding would have to be vertical. I like the slightly irregular appearance of batten on board cladding (as opposed to machined tongue in groove boards). From what I had read, this is also a pretty good system in terms of shedding rainwater.
I also wanted the wood to age and darken naturally, as these barns have done. Furthermore, I didn’t want the hassle of treating the timber with preservative every few years. I already knew that Douglas Fir was a moderately durable softwood and could be used for cladding without treatment. What’s more, it weathers to a nice (in my opinion) silvery grey. Perfect!
I had already decided to use Douglas Fir for the structural timber, so I went with it for the cladding too.
Regarding durability, I learned that completely untreated Douglas Fir has a life expectancy of 10 to 15 years in outdoor use. This is good enough for me and I suspect that the more sheltered walls will last even longer than this.
Step 2: Determine the cladding dimensions
I spent quite a bit of time reading French self-build forums before arriving at what seemed to be sensible dimensions for my cladding.
The cladding is composed of 4 components
- Vertical battens (70mm x 40mm). These are nailed to the timber frame studs.
- Horizontal counter battens (70mm x 40mm). These are nailed to the vertical battens.
- Cladding Boards (140mm x 21mm), These are nailed vertically to the counter battens, leaving approximately 10mm gap in between.
- ‘Cover-joint’ Battens (70* x 21mm). These are nailed vertically to cover the joints in the boards.
*Note: This size was originally supposed to be 54mm. The sawmill boss advised me to make it larger, to reduce splitting, and I agreed. I can’t remember what they suggested but I’d guess it’s 60-70mm. I’ll check on my next visit.
The sketch below will hopefully help illustrate this system.
Another explanatory sketch, from the top of the wall looking down, is shown below.
*Note: Cover-joint battens is probably not an industry standard term. It makes sense to me though as it is the literal translation of “couvre-joints”, which is the French term I am used to using. Also, I can’t remember why the boards are 21mm and not 20mm thick. It’s not like the sawmill is going to be that accurate anyway.
The chunky battens and counter battens combine to give an air gap of 80mm. I have read that the air gap (1) helps keep the house cool in summer (2) helps water vapour leave the wall and (3) helps the boards dry more quickly after periods of rain.
Step 3: Order the materials
The timber cladding was part of one big order placed with a local sawmill. This covered all the timber for the tiny house (except the OSB, Beech worktop and Chestnut floor). I placed the order while still in Scotland and paid a deposit. This gave the sawmill plenty of time to get it ready before I arrived in France. When I got to the site, they delivered it all and stacked it exactly where I wanted it. It was a good service for a fair price and I was happy to support a local business.
The rainscreen and anti-rodent grill were ordered from a local builder’s merchant. Again, this was part of a larger order (which included the lime, hemp and OSB for the floor and shuttering). It was great to have the stuff turn up in one big delivery and the driver was able to drop it off really close to the house (he drove the truck over the adjoining field!).
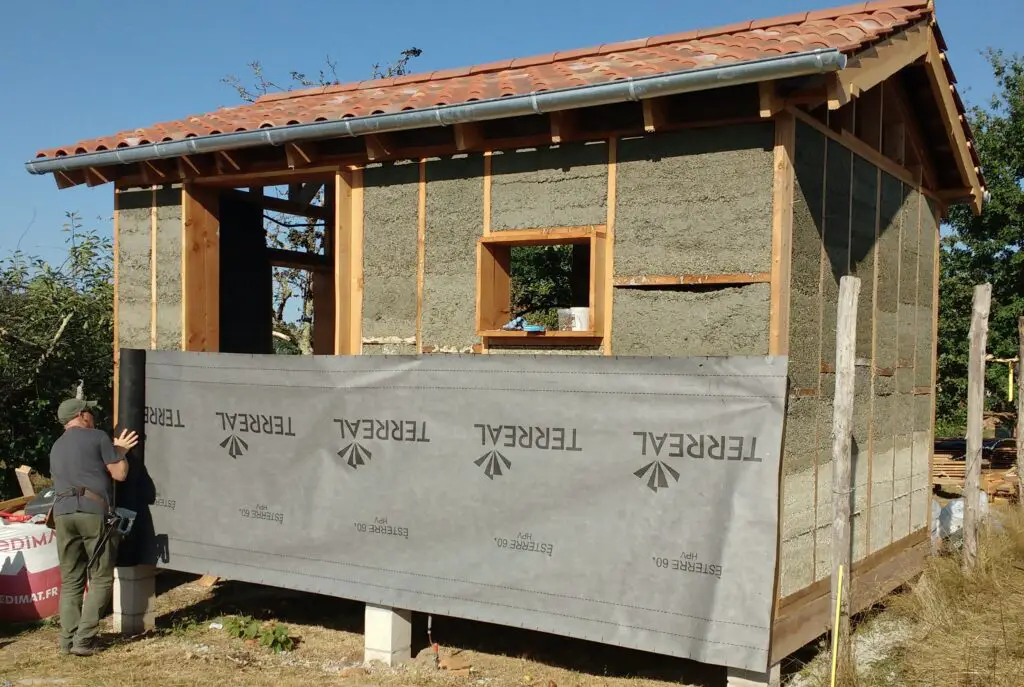
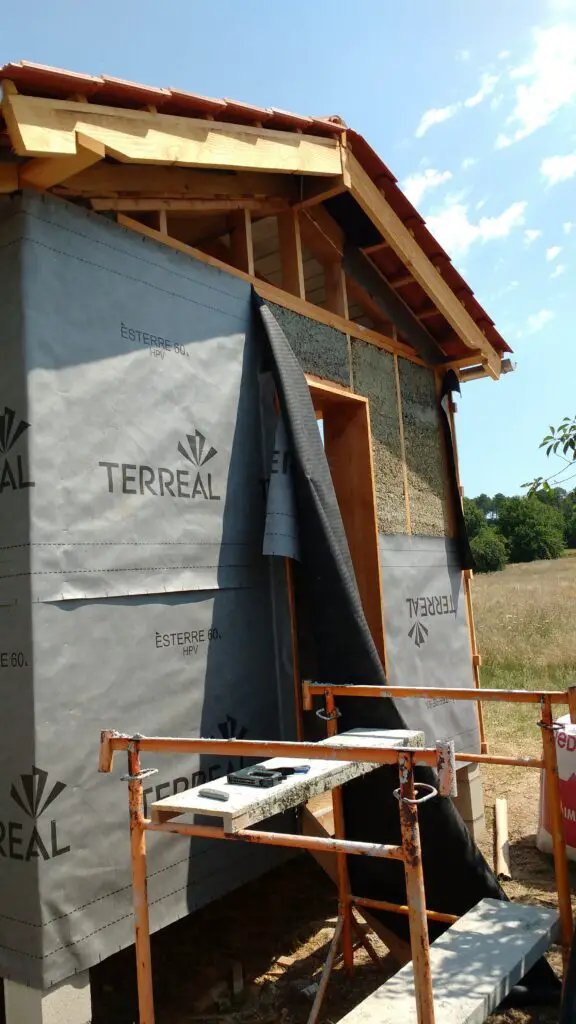
Step 4: Staple on the rainscreen
The breathable fabric rainscreen should help protect the hempcrete wall from water ingress, in the event that some gets past the timber cladding. It was stapled onto the timber studs and overlapped so that rain can’t run down inside the fabric.
Step 5: Nail on the battens and counter battens
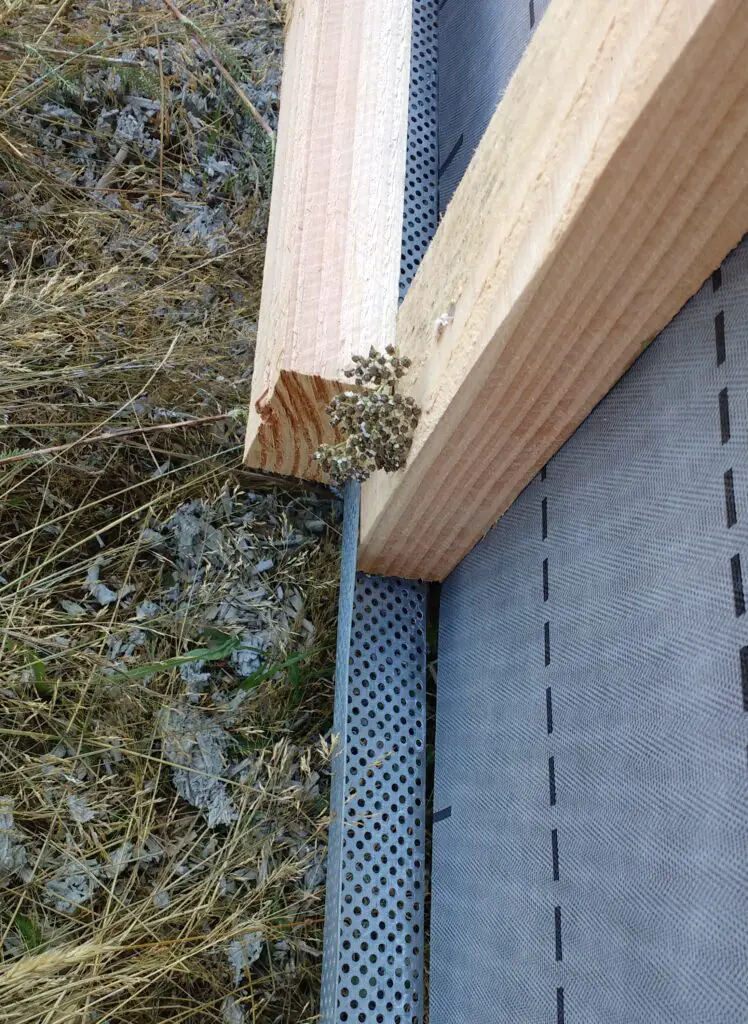
This was simple enough. It was easy to find the studs by feeling through the rainscreen and then put a few nails in. However, this was the moment to remember the “anti-rodent grill”! I don’t know what the real name for this is in English. I have literally translated the French term “grille anti-rongeurs”. It is the perforated, right angled metal strip shown in the picture below. The purpose is to help prevent mice and similar creatures from getting into the cosy gap between the glassing and the wall.
The anti-rodent grill came as a coil of flat strip and is bent into the right angled shape when installing. You can see that it is fitted between the vertical and horizontal battens. It should be installed at both the top and bottom of the wall.
Step 6: Nail on the boards and top battens
In the photo below you can see Rob nailing on the cladding boards. Note that he’s putting the nail roughly in line with the centre of the board. The nails should be in a single vertical line. Using 2 nails, side by side, increases the chance of the wood splitting as it expands and contracts.
The boards were spaced roughly 10mm apart. In practice it was impossible to get a consistent spacing as the boards were not dead straight. Sometime there was no gap, other times it was bigger than 10mm.
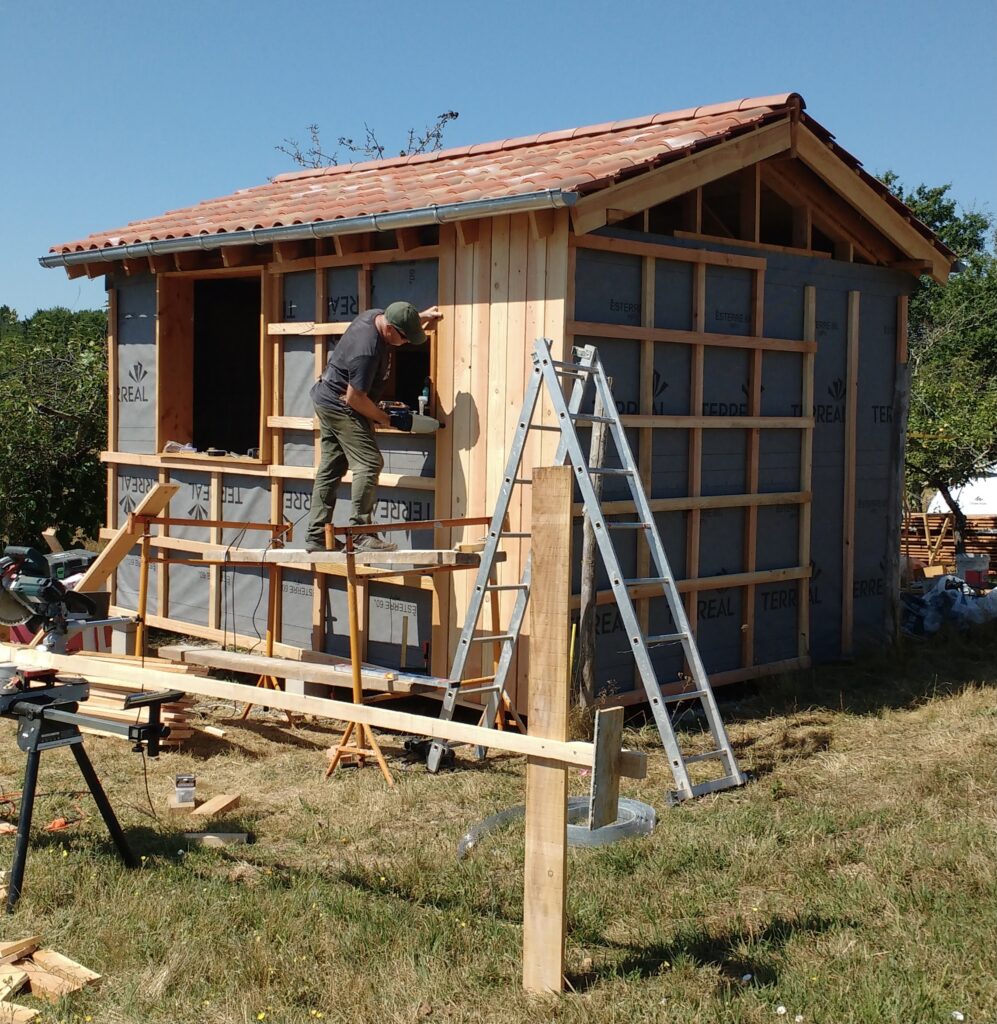
In the foreground you can see the temporary stop that was set up and attached to the chop saw. This allowed all the boards for this wall to be cut to the same length without measuring every time.
A jigsaw was used to cut the tops of the boards to fit around the rafter ends.
The ‘cover joint’ battens were then nailed in place. The theory is that the nail should pass through the gap in the boards underneath. In practice, this is practically impossible. So, we made our best guess, but we probably caught the edges of more than a few boards.
Unfortunately the cover joint battens would sometimes split as the nail was fired in by the gun. If you have the time, it might be worth nailing these battens on by hand. I did so on one wall and it helped a great deal. The old trick of blunting the end of the nail slightly also helps avoid splits. If you really wanted to be super neat (and you had the time) you could drill a pilot hole before nailing. This might be taking it a bit too far though…
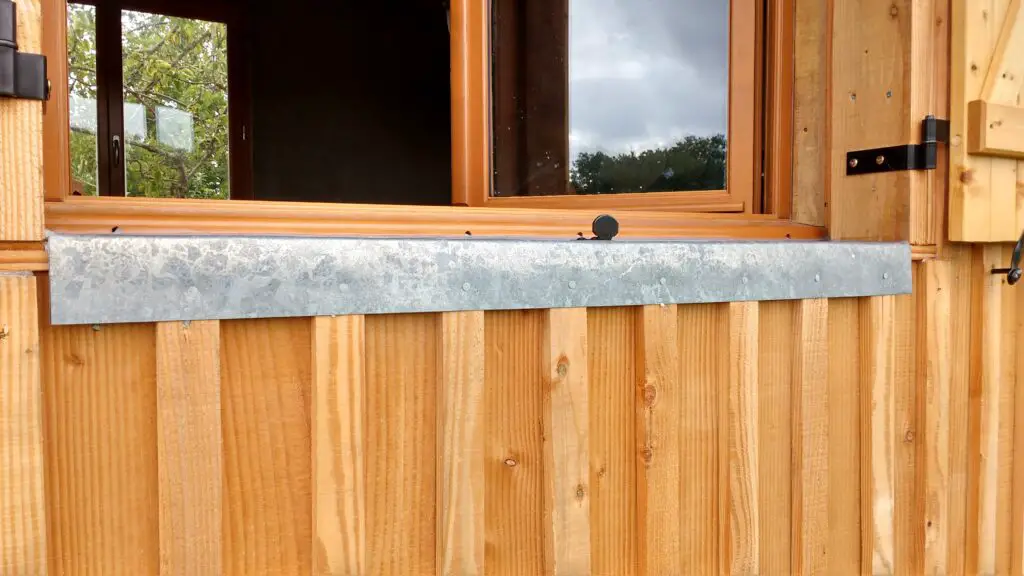
The final result is shown below, complete with DIY zinc window sill protection.
Further Information
Cost
The total materials cost of the timber cladding for was around 1600 Euros. This includes the rainscreen, the anti-rodent grill and all timber.
This works out as 45 Euros per square metre.
Interestingly, this website says that Douglas Fir cladding normally costs 30-45 Euros/m2 (materials only) and 60-140 Euros/m2 (including installation).
So my materials costs are seemingly within the normal range. I did, however, employ ‘magic’ Rob the carpenter for a few days. Including his labour (400 Euros) brings the total to 56 Euros/m2. Not bad.
I should note that I had enough left over cladding to build a tool chest. Waste not, want not!
Weathering
It’s now about 2 years since the cladding was fitted. The photos below shows how it has weathered in that time.
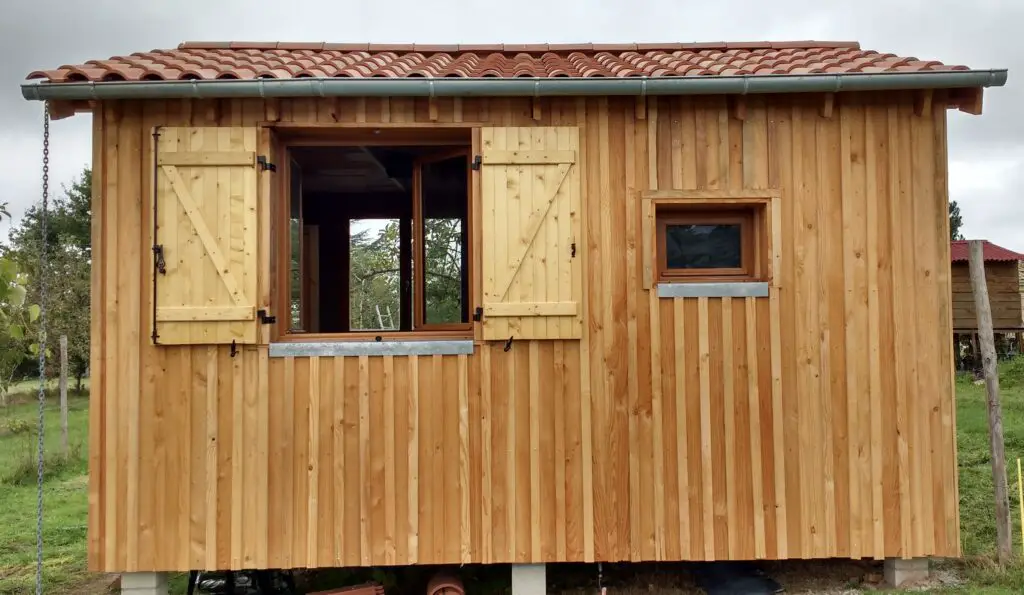
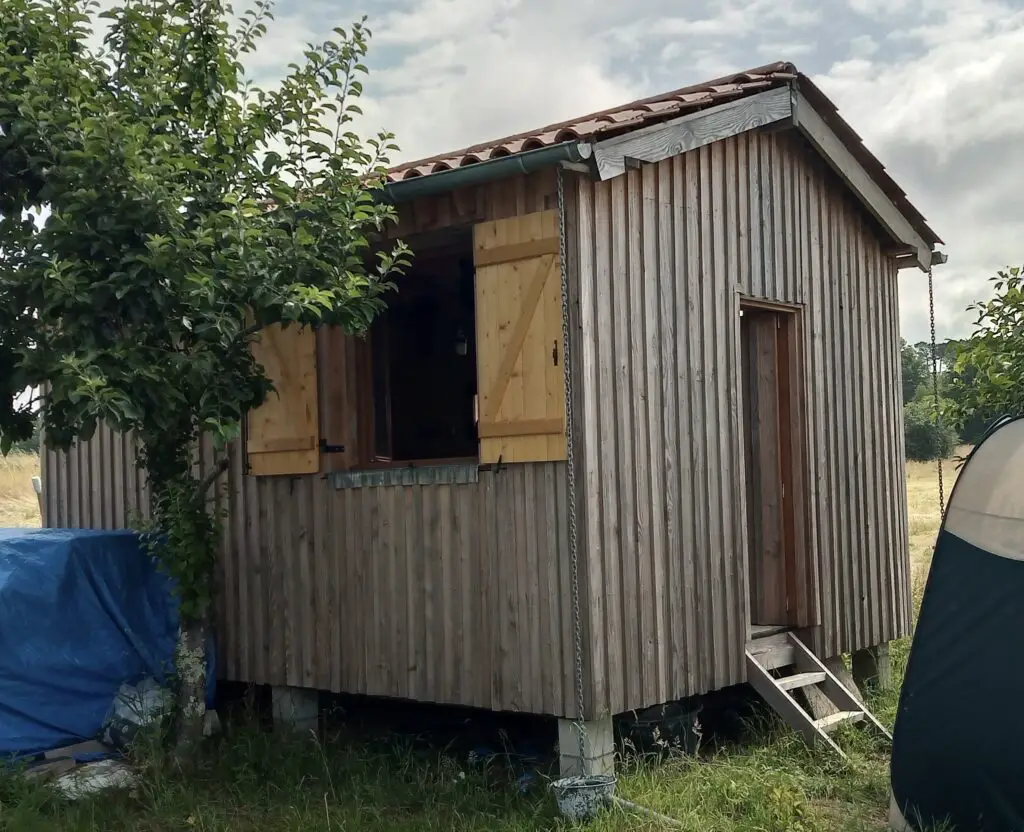
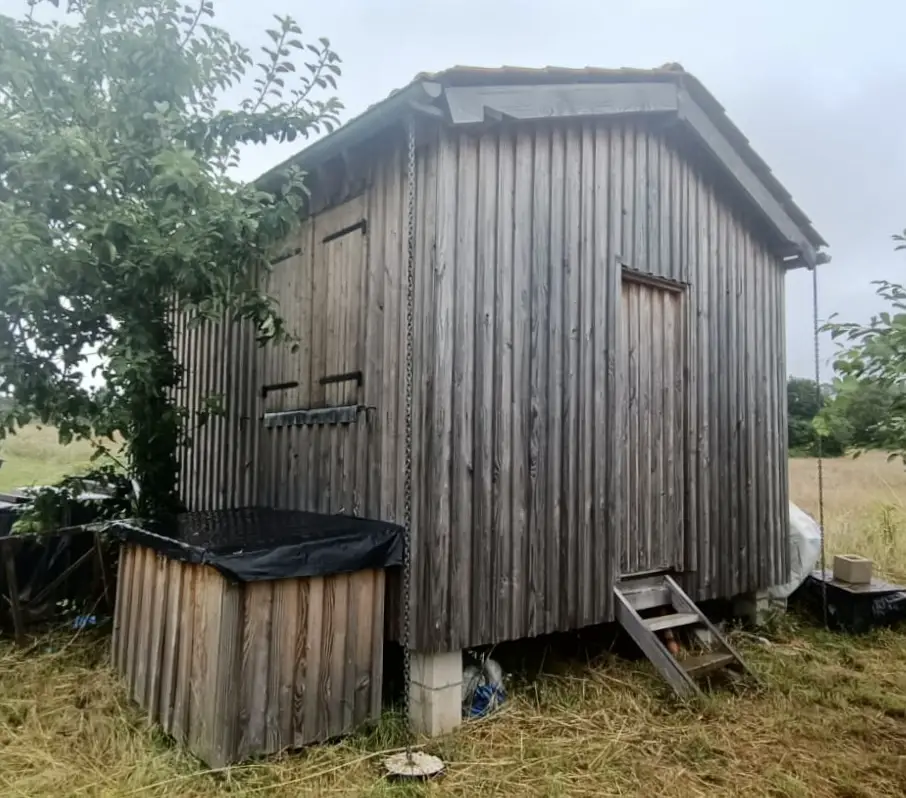
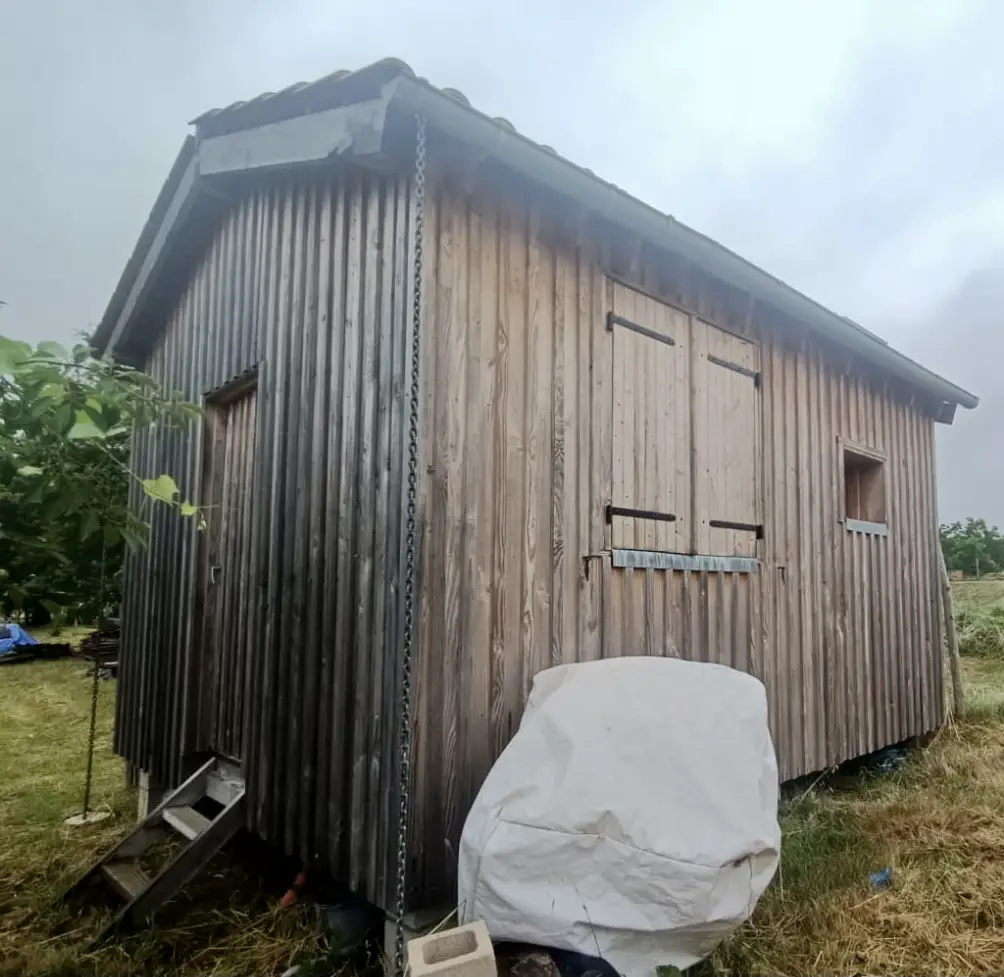
It’s interesting to note how the walls have weathered differently. The gable end receives the worst of the wind and rain (which is unfortunate, as that is where the door is!) and is much darker than the more sheltered side.
I’m sure the weathered look will not be to everyone’s taste. It’s certainly not a ‘bright and clean’ style but it is what I wanted. As it ages, I think the tiny house is already starting to look like it belongs there.
