Free Hot Showers! Part 4: Wonky Water Heater – Tweaks and Test

Pictured is the wood burning water heater firebox
Water heater firebox

In this blog post, I will describe what changes I made to my DIY wood powered water heater and show how it performed in testing.

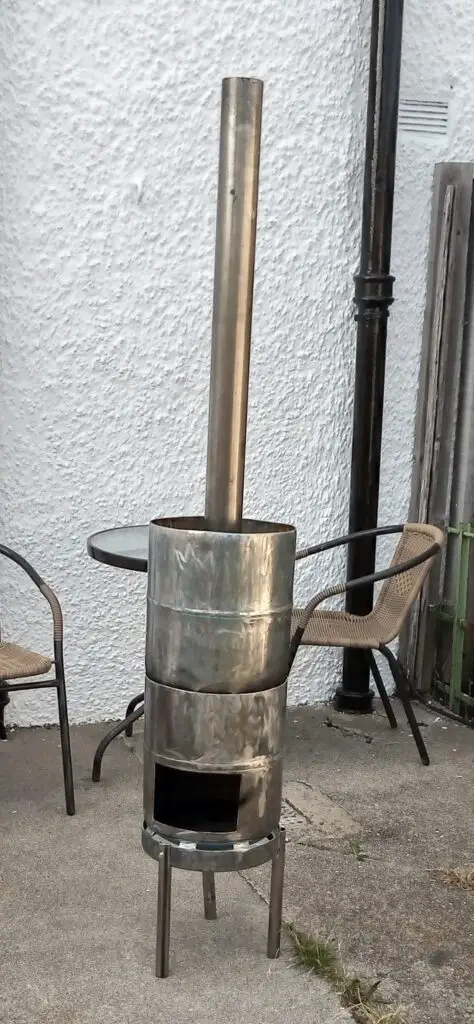
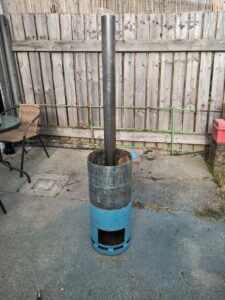
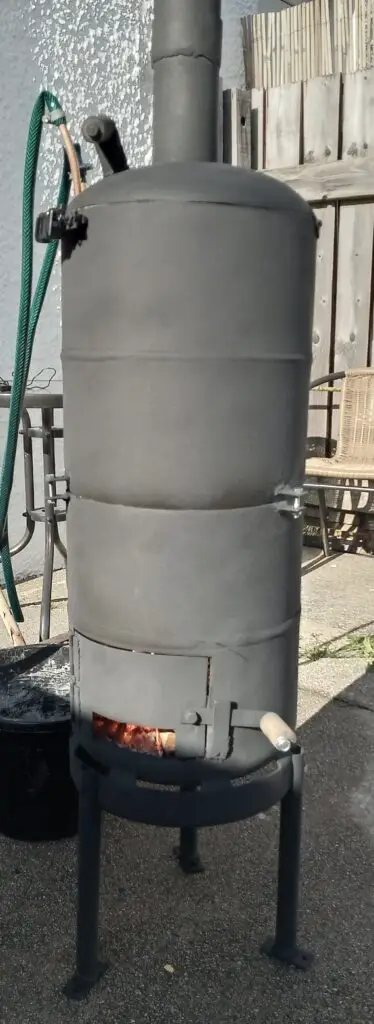
In a previous blog post I described the build and test of the water heater. I have since christened it the “wonky water heater” as it’s a bit squinty and done ‘by eye’. Near enough is good enough, as I often say to myself. Anyway, the heater was made from 2 old butane gas cylinders. The bottom cylinder became a firebox and the top cylinder became a 20 litre ‘thermal store’ (i.e. hot water tank) into which was placed a copper coil. Cold water going into the coil absorbs heat from the thermal store and – hey presto – hot water comes out of the coil. The aim was to give enough water for a few hot showers in my tiny house by simply burning scraps of wood or scavenged sticks.

Firebox

Pictured is the water hear door in closed position
Firebox door in closed position

The first thing I did was to fit a door. The aim of this was to reduce heat loss and – hopefully – transfer more to the water.

The door itself was made from the previously cut out rectangle and the hinges were very inexpensive mild steel items. I fabricated a latch to hold it shut, the handle of which was cut from a wooden broom. At the bottom of the door I cut a slot which I hoped would allow enough air in for good combustion. This actually worked very well. With the door closed the air rushes in and up through the burning wood. You can really hear it roar!

Pictured is the firebox showing internal insulation
Firebox open showing insulation

The second thing I did was to coat the inside of the firebox with a layer of fire cement mixed with perlite. I used just under 3 x 2kg tubs of cement (from Screwfix) and most of a small bag of perlite (from a garden centre). The ratio was about 1 part cement to 2.5 parts perlite, with a splash of water added. The resulting mix was sticky enough to adhere to the walls of the firebox. I used a plasterer’s mini finishing trowel to apply it.

I hoped that this layer of insulation would reduce heat loss and wear on the steel body itself (in the same way firebricks do in a wood burning stove).

In practice, the outside of the firebox still gets very hot so I don’t know how much energy is saved. The cement/perlite layer became very tough when fired, so I’m sure it at least offers good protection for the steel.

I also welded on some rectangular feet to the bottom of the legs (see image at the top of the page). These make the heater more stable and allow it to be bolted down, if required.
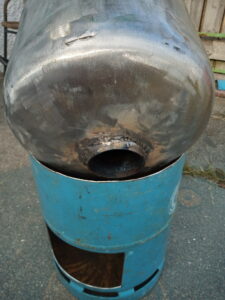
Thermal Store

The thermal store got some attention too. The first improvement was the addition of a hinged lid with a slot cut out for the flue and copper pipe. I later added a wooden handle to make it easier to open and close the lid when hot.

Pictured is the water heater hinged lid
Water heater hinged lid
Pictured is the finished wood powered water heater
The finished water heater

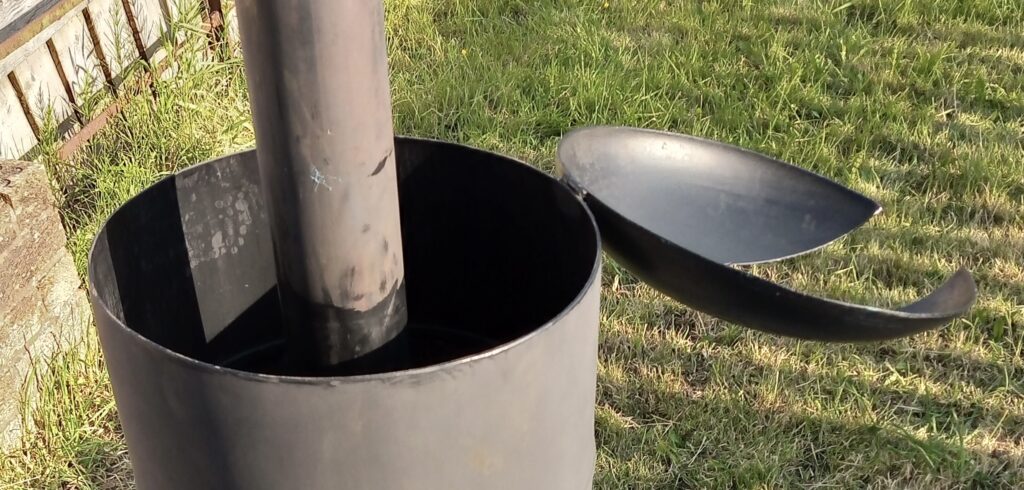
The second job was to make the flue demountable. To do this I cut a small section (about 40mm) off the top. I then cut a slot in the small piece so it could be expanded slightly to fit over the stub of the flue. Next it was welded onto the stub to form a collar into which the top part fitted.

The third task was to install the thermometer. The bracket was simple enough – just a small piece of steel flat bar attached to the top of the thermal store with two bolts. The bolts space the thermometer away from the worst of the heat (it’s made from plastic). Cable ties were used to attach the thermometer to the flat bar. A hole drilled in the thermal store allowed the temperature sensor and wire to pass through. The sensor itself dangles in the water about 1/2 way down.

Lastly, the heater was given 2 coats of high temperature black paint from a spray can. This didn’t cover the blue paint of the lid very well (which I had already given a coat of engine enamel) but worked fine on the bare metal.

Performance test

I wanted to find out if the modifications would get the heater up to temperature more quickly and give greater hot water output.

Pictured are some split birch logs
Birch logs used for test

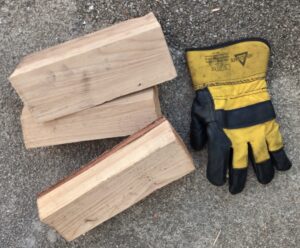
I also tried some ‘proper’ hardwood logs (Birch) rather than pallet wood.

The photo gives an idea of the firewood size. In practice I could only fit one of these at a time (at least until the previous wood had burned down).

Over the course of the test I used 2 full ‘blocks’ and some kindling.

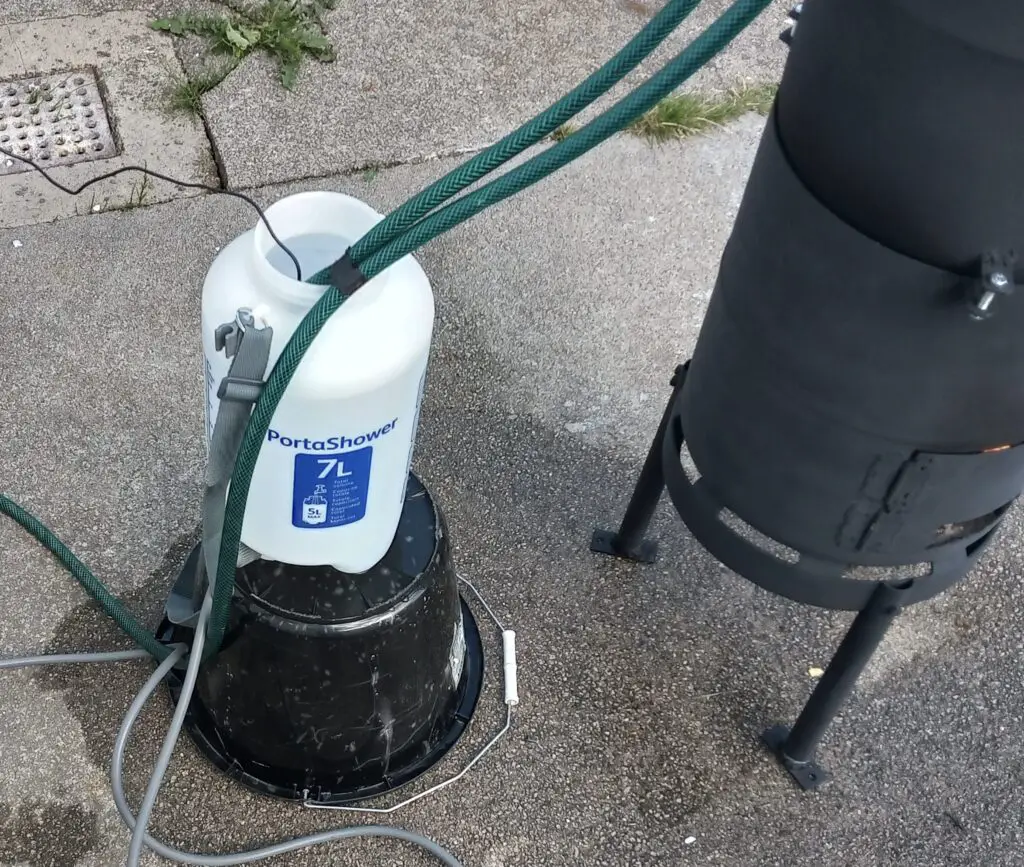
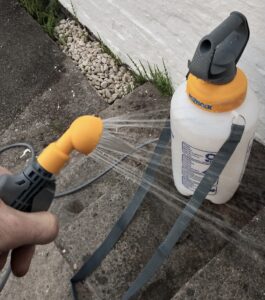
The other change to the test setup was to draw off hot water in 5 litre amounts. I did this by filling up my Hozelock porta shower. In this way I hoped to learn how many showers the heater could produce for a certain quantity of firewood. A ‘shower’ was defined as 5 litres of water at 40 deg C or above.

Pictured is a Hozelock porta shower being filled
Heater used to fill Hozelock portashower

The video below shows the water heater being put through it’s paces.

Test Results

The firebox was loaded with some kindling and 1 block of Birchwood and it lit very easily. The temperature rise in the thermal store is shown below.

Burn timeWater tempNotes
0 minutes18 deg C
10 minutes45 deg C
20 minutes69 deg C2nd log added after 25 minutes
30 minutes90 deg C
33 minutes95 deg C

The temperature of the water in each 5 litre fill of the Portashower is shown below.

Shower NumberShower Water TemperatureThermal Store Temperature
174 deg C95 deg C
261 deg CNot measured
355 deg CNot measured
448 deg CNot measured
544 deg C61 deg C
641 deg C56 deg C
Pictured is the Hozelock Portashower being tested
Hozelock Portashower test

Around 10 mins after shower 6, the temperature in the thermal store had risen again to 65 deg C. By this time the firewood was glowing but there were no flames. It was enough to produce a 7th shower at 42 deg C.

During the course of the test, the outside of the firebox got very hot, so this is still an obvious source of heat loss. In future, I may try to cast an external layer of perlite/fire cement insulation around both the firebox and the thermal store.

I also pressurised the Hozelock Portashower and measured the shower time. With a full 5 litres, the shower lasted 3 minutes and 30 seconds (including occasional stops to pump It up a little).

Conclusion

The water heater got up to temperature more quickly and produced more hot water than during the previous test.

Clearly the temperature of first few showers was far too high. In practice, cold water would have be added to get a normal shower temperature of 40 – 45 deg C.

It’s reasonable to say that the heater would give 8-10 showers at 40-45 deg C from just over 2 blocks of wood.

In practice, one filling of the firebox should be enough to see the thermal store get to 70-80 deg C and provide 3 showers. This is fine for the tiny house, which will probably only be occupied by 1 or 2 people at a time.

Obviously in the winter the initial water temperature will be lower and more firewood would be necessary to get the same hot water output.

In spring and autumn I hope to use a solar heater to pre-heat the water. In which case the heater may use less firewood for the same result.

In summer it’s likely that the solar heater will provide almost all the hot water and the wood powered water heater will be hardly required.

The total cost of the project was around £150. This went on steel tube, steel flat bar, paint, welding wire, screws, nuts and washers, fire cement and perlite, hinges, a copper coil, 2 thermometers, grinder discs and a drill bit.

It should be possible to run the water heater on scavenged ‘windfall’ sticks and branches and waste wood from the tiny house build. So it does live up the promise of “free hot showers” (after the initial build cost). However, it’s likely that I will be buying some hardwood for the tiny house wood stove anyway and some of this will find it’s way into the water heater in winter.

Free Hot Showers! Part 2: Water heater build and test

Pictured is a DIY wood powered water heater
Wood powered water heater nearing completion

It’s done! Today I tested my wood powered water heater and I’m glad to say that it works. In this post I’ll outline the build, the results of the performance test and what improvements could be made.

If you haven’t read Part 1, the aim of this project is to make a water heater that is connected to the tiny house plumbing system but is actually located outside the house.

This has the benefits of not overheating the house in summer and not requiring an (expensive) double wall flue installation. Furthermore, having it outside will safe space and the heater can be ‘quick and dirty’ (e.g. no need for a fancy sealing door).

It has recently occurred to me that this heater could also be useful for ‘topping up’ hot water produced by solar energy. This would be handy in the winter or on cloudy days.

Pictured is a DIY water heater in the early stages of construction
2 gas cylinders and a flue pipe

The Build

The water heater was made from 2 gas bottles which originally contained 13kg of butane.

After emptying the bottles of gas and purging them with water, the top was cut from both cylinders and the metal support ring was also removed from one of the cylinders.

One of the cylinders became the ‘firebox’ (bottom), the other became the ‘thermal store’ (top).

Pictured is some terrible welding on my DIY water heater
Terrible welding – but it did work eventually

The thermal store had a hole cut in the bottom and a piece of 75mm tube welded in place. I had barely used my welder before this, so my welding was terrible. It took a lot of grinding, testing and re-welding before the join was watertight.

Pictured is a Sealey Mighty MIG 100 Welder
Sealey Mighty MIG

By the way, the welder I used was a Sealey Mighty MIG 100. This uses flux cored welding wire (no gas required). It’s quite basic but seems to be fairly decent quality for a budget machine.

The rectangular hole in the firebox was cut big enough so that it could be filled with fairly large pieces of wood.

Pictured is an abrasive wheel
Bosch abrasive wheel for grinder

Removing the original blue paint was achieved using a Bosch abrasive wheel fitted to an angle grinder. This took a little time but the wheel was very effective and lasted for the whole job (still going strong).

Pictured are the water heater’s bolt on legs
Bolt-on legs

Three bolt-on legs were fitted to the firebox and some brackets welded onto each half of the heater so they could be bolted together. This was a safety issue as I didn’t want the thermal store (scalding water) to be able to be easily detached from the base. Prior to this, the thermal store was just sitting in place.

The final step was to put a heat exchanger coil inside the thermal store. This was made from a 10m length of soft copper ‘micro bore’ pipe with a diameter of 10mm. I thought this might be too small but I gave it a try anyway.

Test Procedure

I added 20L of cold water to the the thermal store and connected one end of the heat exchanger to the mains via a garden hose. The other end of the heat exchanger discharged into a bucket via a short length of hose.

Digital thermometers were put inside the thermal store and the discharge bucket.

The firebox was filled with scrap wood from a pallet and the fire lit.

Performance Results

The video below shows the water heater being tested.

The initial temperature of the water in the thermal store was 17 deg C.

After 15 minutes of heating the temperature was raised to 47.5 deg C.

After 35 minutes, the temperature in the thermal store was 70.9 deg C.

Test 1

At this stage I drew off 2 buckets of hot water (10L per bucket). The first bucket had a water temperature of 37 deg C and the second was 34.8 deg C, giving an average of just under 36 deg C. The temperature in the thermal store had dropped to 51.6 deg C.

Next, I added more wood to try to get the water in the thermal store as hot as possible.

Test 2

After a further 20 minutes of heating, the water in the thermal store was 87.8 deg C.

I drew off 3 buckets of hot water. Their temperatures were 51.4, 42 and 36 deg C. So the heater had given 30L of water at an average temperature of 43.1 deg C.

The water in the thermal store had decreased to 60.4 deg C.

By this time the flames had died down and firebox consisted mainly of embers.

Test 3

As a final test I waited for 10 mins, without adding further firewood and drew another 3 buckets of hot water from the heater.

The average temperature of this final 30L of water was 31 deg C.

Regarding wood consumption, after the initial fill, I topped the firebox up once. That equates to, perhaps, 3 planks from a pallet and one or two chunkier blocks.

The heater burned quite cleanly i.e. there was not a great amount of smoke visible from the top of the flue.

During the course of the tests, the water level in the thermal store dropped by 1-2 cm, presumably from evaporation.

Conclusions

I was more than happy with the results of this test.

Firstly, the water heated up remarkably quickly. With a full fire the temperature increased by about 10 deg C every 5 minutes.

The heater performed best when the water in the thermal store was very hot (almost 90 deg C). This temperature could be easily reached in 45 minutes from cold.

With a thermal store temperature of around 90 deg C, the heater could provide 30L of water at an ideal bathing temperature (40 – 45 deg C). If used to fill my Hozelock portashower, this would be enough for 6 showers (plenty for my 3 person tiny house).

I see no reason why it would not be an effective way of topping up the temperature of solar heated water on cloudy days.

The small capacity heat exchanger coil worked surprisingly well at removing heat from the thermal store. I had considered doubling it’s length or replacing it with a larger diameter coil but I’ve decided to leave it as it is.

Improvements

Heat is almost certainly being lost through the open hole in the firebox. Adding a door may help reduce these losses. Of even greater benefit would be insulating the firebox. It should be possible to do this by adding an insulation blanket (such as ceramic fibre) to the inside walls and base. It these two improvements are made, then more heat would be transferred to the water above, increasing the performance and/or reducing the wood consumption.

External insulation of the thermal store might also improve performance. At the very least the water would stay hotter for longer after it had been heated. I will try to cast a thin layer of hempcrete around the thermal store for this purpose. It will cost me nothing to try it (I have plenty left over from the tiny house build).

Another possible improvement is the fabrication of a lid to cover most of the top of the thermal store. This might reduce heat loss as well as water loss from evaporation. My idea is to make it hinged so that it could be swung back out the way for easy filling of the thermal store by bucket.

Besides the above, I will give the heater a coat of black high temperature paint and cut the flue into 2 sections that can be re-assembled. This will enable easier transport of the heater by car.

Types of hemp shiv and binder

In this post I will go into a bit more detail about the types of hemp shiv and binders that can be used to make hempcrete.

Hemp Shiv

There are 2 types of hemp shiv: course and fine.

Course Hemp Shiv

When building my tiny house I used course hemp shiv of the brand ”Isocanna” which is sold by St. Astier (who also make the lime which I used.)

According to The Hempcrete Book the pieces of hemp shiv of this type should be 10-25mm long and should be as free as possible from dust. The course hemp shiv produces a hempcrete matrix structure that is strong but also fairly open and breathable.

Fine Hemp Shiv

I only recently learned that hemp shiv was available in a finer grade. It’s now about 15 years since I first got some training in the use of lime and hemp and nobody mentioned it then!

According to the French supplier Isol Naturel, the size of their fine hemp shiv is 5-10mm.

St Astier likewise have a fine version of their Isocanna hemp and in the UK I found that Lincolnshire Lime also stock fine grade hemp shiv.

Interestingly, the fine hemp can be used to make an insulating ‘lime plaster’. In other words, a finish coat of lime/hemp applied to the rather more coarse hempcrete walls. I wish I had known this before building the tiny house as I would have used the fine grade shiv for this purpose. Instead, I used the coarse grade for everything, which wasn’t ideal.

Another use for fine hemp shiv, according to The Hempcrete Book is in spray applied hempcrete.

Lime/Cement Binder

Types of lime and cement

I’ll discuss briefly some of the different types of lime/cement that are available (please note, I don’t claim to be an expert or want to write a book on the subject!). My knowledge was picked up in France, so the terminology may not be the same in your country.

It seems to me that the various types of lime are based on the amount of ‘impurities’ contained within them, which has the effect of altering their properties.

At the very pure end of the scale, we have the very white ‘air lime’ (Chaux Arienne in French). This only sets in contact with the air and can be bought as a powder in sacks or in tubs as a putty. It’s not mechanically ‘strong’ and is often used for more decorative purposes. I have used it for making a brilliant white lime wash (think Greek houses) and, when combined with marble dust for making Venetian Plaster (imitation marble). Because it is so creamy and sticky, it could added to other lime mixes to make them easier to work with. Sacks of this kind of lime are normally labelled CL90.

Hydraulic limes (Chaux Hydraulique) contain impurities (such as silica and alumina) and require water and air in order to set. They come in different grades from weakly hydraulic to strongly hydraulic, depending on the levels of impurities. The weakly hydraulic grades are softer, more flexible and lighter in colour. The strongly hydraulic limes tend are more ‘cement like’ – less sticky, stronger and grey. These types of lime are labelled NHL (Natural Hydraulic Lime). They are available as NHL2, NHL3.5 or NHL5 (least to most hydraulic).

Lime with more than 20% of cement added is labelled NHLZ.

Natural cement is extremely hydraulic and sets very quickly and very hard. Critically, it is also vapour permeable.

Portland cement is made from a mixture of limestone, shale, gypsum and other additives. It is strong and hard but not vapour permeable.

Binders for use with hemp

As far as I can see, the self builder has a choice between using a binder that has been specifically formulated for making hempcrete, or another type of binder that is normally used for other purposes.

In The Hempcrete Book, it is advised that the binder should have a strong initial set so that (when building a wall) the shuttering can be removed fairly quickly (within 24 hours) without risk of the lower parts of the wall failing.

The formulated hempcrete binders do provide the reassurance of this initial set. The brands Tradical and Batichanvre, for example, are thought to achieve this by a mixture of lime , Portland cement and possibly other additives. The volume of added cement (20-30%) is said to not inhibit overall vapour permeability. Another formulated option example is the Prompt brand of natural cement made by Vicat.

The non-formulated lime binders are perhaps more of a risk but may be cheaper and more easily available. They also have the advantage of not including portland cement. This may be important to you from an environmental impact point of view. I don’t know to what extent the avoidance of cement improves the vapour permeability of the wall.

I found online some guidance from an association of French hemp producers on the use of natural hydraulic limes as binders for hempcrete.

For external walls, they suggest the following mixture:

200L of hemp: 70kg of Lime (NHL 3.5 or 5) : 80L of water : 20-30L of clean sand (optional).

For my tiny house I used the formulated binder Batichanvre. It was indeed grey and cement like. I never had any problems regarding the strength of the hempcrete – it came out pretty solid.

The authors of the Hempcrete book strongly advise against the use of non-formulated binders.

Despite this, were I to build with hempcrete again, I would experiment with the NHL mixture above. Assuming that I had enough time, I would use the mixture on a small ‘test wall’ and see how it fared. If it stayed solid after the removal of shuttering, was not crumbly, and seemed to be drying out properly after a few weeks, then I would be confident enough to use it on other walls.

Ultimately it’s up to each builder to choose what level of risk they are prepared to accept and what their priorities are.